Ok, so not so much profit in this post but if you are able to get this working properly you could save a bundle of money for your business and home networks and perhaps gain the experience to land a decent paying job. Pfsense is an open source firewall brought to us by the good folks at Netgate, if you have the ability to purchase their equipment, I recommend you do so in order to keep them in business.

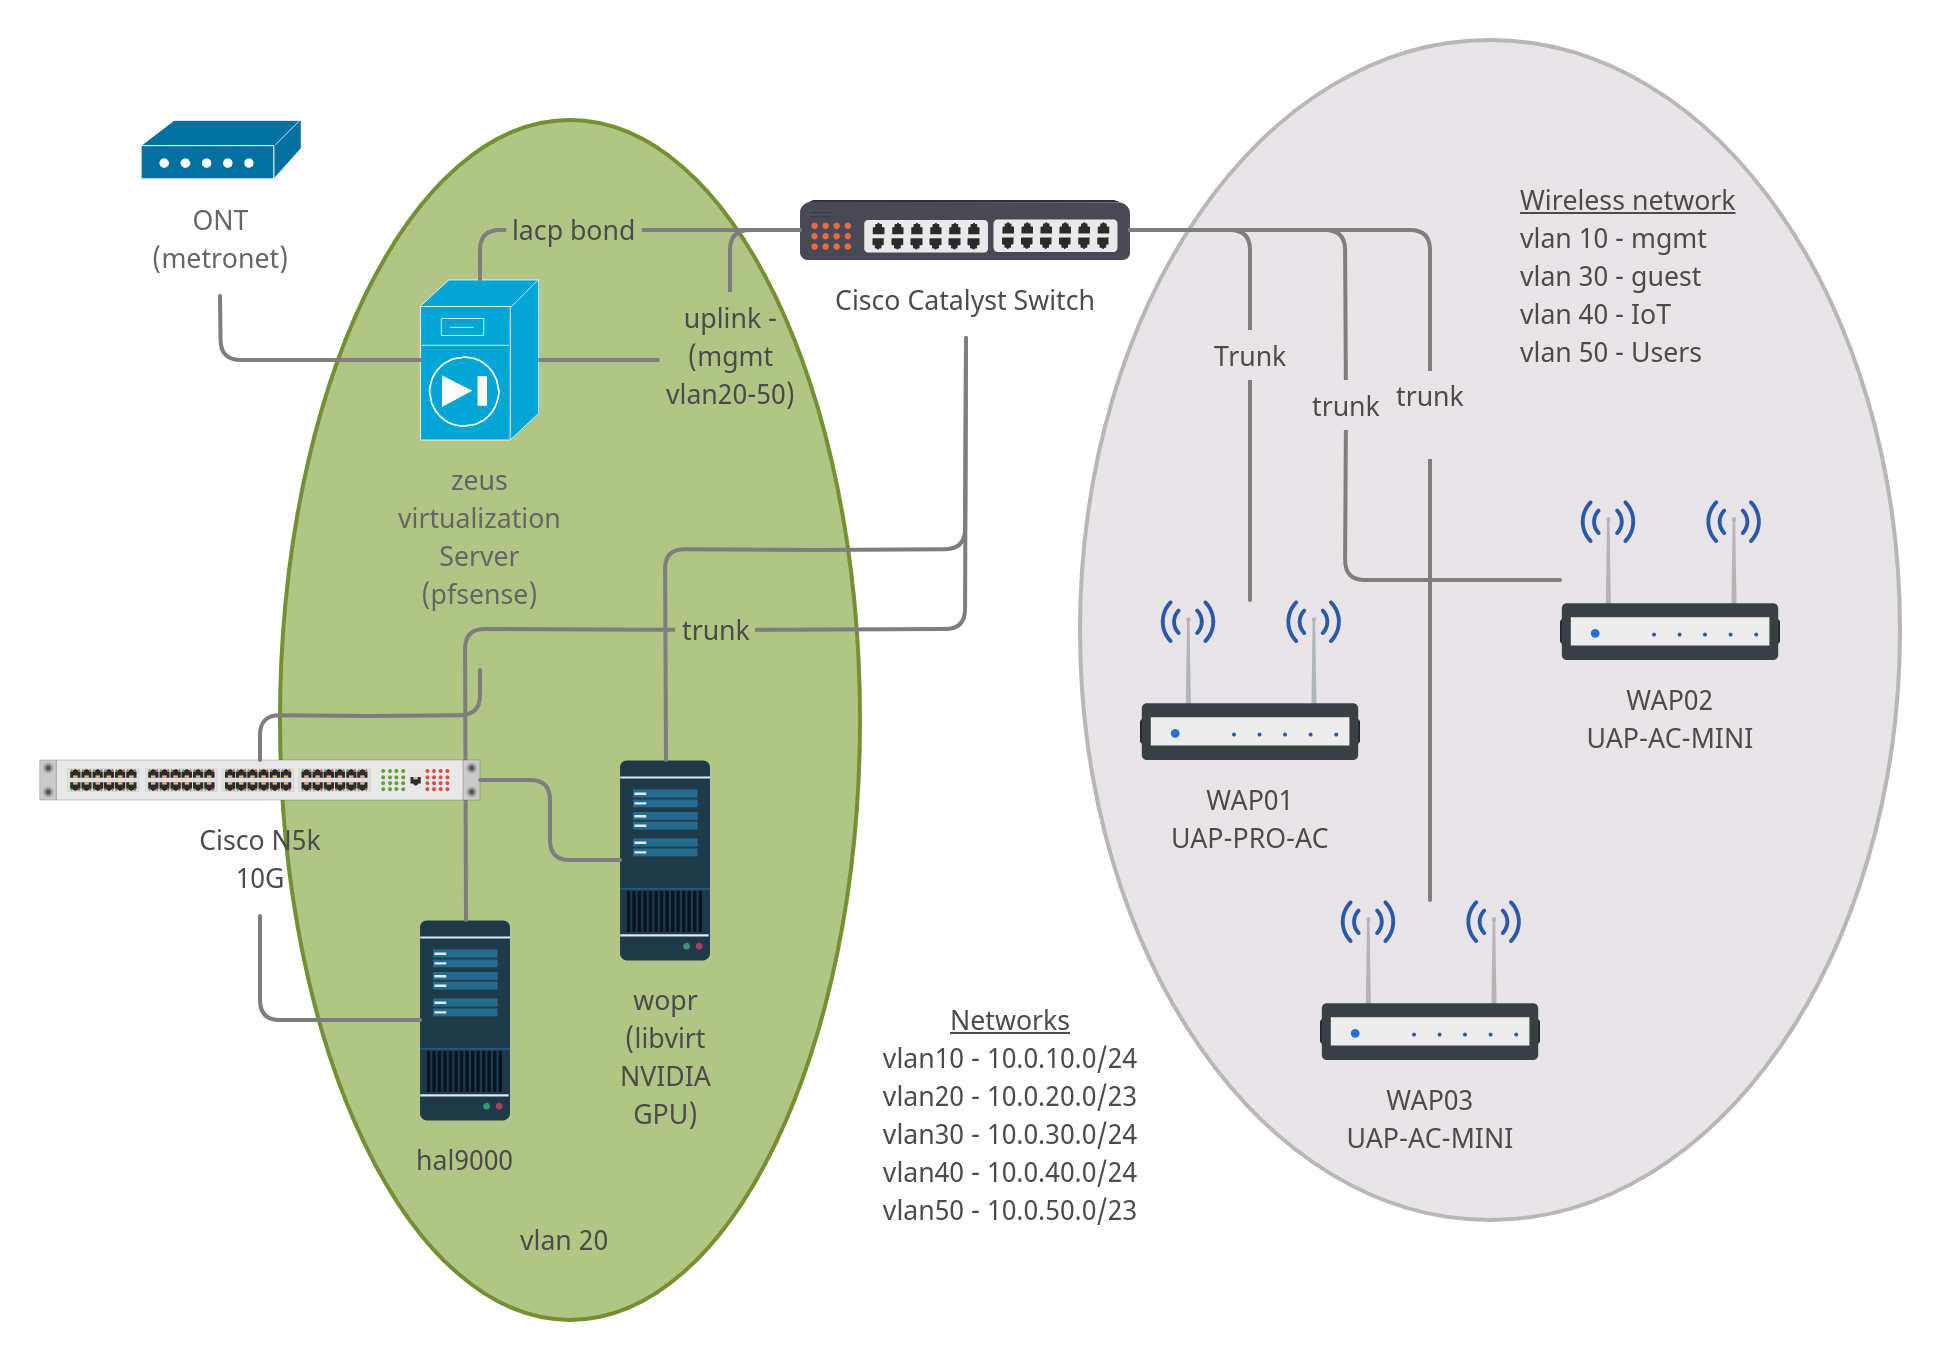
Your home network may look much different than this but I've tried to cover the majority of situations. A quick description is in order, I guess.
- ONT - Provided by ISP (basically a fiber modem)
- 2960s & N5K - Network switches
- WAP01,WAP02, & WAP03 - Wireless access points
- zeus & hal - Development/Test Server
- wopr - Production Server
The only thing missing is the pfsense firewall (which also acts as a router). This is a cheap computer I came across at a client's site they were going to trash. It has an Intel core-i5 CPU with 8 GB of RAM and a 4-port PCI Intel network card, I found the network card on ebay.
I started this journey with just one server, one access point, and a dumb gigabit switch with pfsense running in a virtual machine on VMWare ESXi. So don't worry if you don't have more than an extra computer sitting around to set this up, you can virtualize just about everything and the best part is... all the software is open source.
Installing the software
First thing to do is download the installation media from the pfsense site. If you are going to install to bare metal (stand alone computer) then get the USB memstick for a VGA console version from the location nearest to you, if you are going the virtual machine route, get the ISO for VGA instead. Be sure to compare the sha256 checksum (Windows, Linux & Mac) once the download has completed to make sure the file is undamaged. Create your installation media using your favorite utility, I recommend using Etcher, it's easy to use, open source, and multi-platform.
If you are installing to a virtual machine, pfsense is based on FreeBSD 11 so select that OS when creating the VM. I ran the VM with 1 core (x86_64) and 1 GB of RAM for years and had no problems, the minimum specs call for a 500 Mhz CPU and 512 MB of RAM but there are reasons to give it substantially more horse power particularly if you plan on using add-ons that sniff traffic or do ad blocking.
Which ever method you plan on using, the easiest configuration is a system with 2 discrete network cards. There are ways around this issue, network namespaces and VLANs are both options but those configurations are outside of the scope of this article.
Boot your system and go through the installation procedure.
Caution: I've tested "Auto (ZFS)" on a number of bare metal and virtualized installations and in every single test the partition has failed. I may be doing something wrong when creating the array. Be warned this option is for those with extensive experience configuring hard drive partitions and RAID arrays. If you don't know what ZFS is and why you would want to use it, stick with UFS, you will be much happier.
Now the base system has been installed, the system will reboot and ask a few questions. The first will be about configuring VLANs, I don't recommend configuring VLANs at this time, unless you only have one NIC, it's easier once you are able to login to the web console. The next will be identification of the WAN interface followed by the LAN interface, which you will need to assign an IP address. The IP address for the LAN interface should be in the rfc1918 space and is personal preference depending on your needs. If you don't know which interface to use for WAN/LAN you can change it easily by going through the process again. Be sure to turn on the DHCP server when asked once this step has been completed.
Initial Setup
Open a web browser and point it to the IP address you used for the LAN interface in the section above. You should see a page that looks like the image below.

You will see a WARNING message indicating the 'admin' account is using the default password. If you continue through the setup, you will eventually come to a page where you can reset the admin password.
Set the host name of the firewall, the local domain name for your network and what ever DNS you like (I will be writing more about DNS in a future article but I recommend configuring a pihole or using pfblockerNG for safety and other reasons). The rest of the installation is fairly self-explanitory, look for more articles detailing VLANs and their use cases, setting up a pihole with local machine name resolution, among others.
That just about wraps it up. Now you have an enterprise level firewall (and router) running on your own equipment and you can do things with it formerly reserved for large corporations with big pockets.
